
For those following along, this is Part 2 of my series on how the New York Times can make simple updates to improve their website’s accessibility. “Part 1 – Simple Accessibility Updates to Improve New York Times New Redesign” is available for those who missed reading it.
Reminder: I’ve written these posts to help to the New York Times, along with anyone with large websites, or those who are designers or developers, etc., to show that simple incremental changes can improve their website in the long run.
In this post, I will cover the following accessibility issues with the New York Times home page:
- Missing skip navigation
- Difficultly seeing visual cues for those only using the keyboard
- Poor color contrast
- Not able to use video player by keyboard only
- No captioned videos for individuals that are deaf or hard-of-hearing
Adding Skip Navigation
Skip navigation allows people that use a keyboard or assistive technologies like screens reader JAWS, NVDA, VoiceOver, etc.) to bypass large sets of links and focus on the content. Unfortunately, the New York Times pages are missing skip navigation, which means that screen reader users must listen to all of the preceding content before getting to the main articles.
Adding skip navigation to your pages is fairly easy as shown in this article on my blog called “Are You Using Skip Navigation?”.
You can choose between a few different techniques to hide your skip navigation depending on what your design team or marketing department want. Here are a few articles about skip navigation:
- Web AIM’s – “Skip Navigation” Links – @WebAIM
- Multiple Skip Navigation articles by Roger Johansson (456 Berea Street) – @rogerjohansson
Note: These websites have additional accessibility articles you might want to read when you have the time.
An example of skip navigation can be found on my main website (press TAB to see the “Skip to Main Content” link at the top of the page). I haven’t yet updated my blog’s WordPress theme to include skip navigation.

Thinking About Color Deficiency (Colorblindness)
Approximately 8% of the population (mostly male) has one of the three main types of colorblindness (deuteranopia, protanopia, and tritanopia). This, along with small text, might make it difficult to read parts of the New York Times homepage.
The following examples demonstrate what people with normal vision see as compared to the three main types of colorblindness:

Normal vision

Deuteranope (a form of red/green color deficit)

Protanope (another form of red/green color deficit)

Tritanope (a blue/yellow deficit- very rare)
To help people who are colorblind, the New York Times needs to verify the color contrast ratios.
Analyzing Color Contrast
For those who have low vision, poor eyesight, or colorblindness, some of the text on the New York Times home page could be difficult to read. An example would be the bylines to their articles.

Bylines from New York Times feature articles on home page
If you were to use one of the many check color contrast tools, such as Jonathan Snook’s “Colour Contrast Checker” you input the foreground (font/text) color and the background color to see if it passes WCAG 2.0 standards:
- Level AA: contrast ratio of 4.5:1 for normal text and 3:1 for large text
- Level AAA: contrast ratio of 7:1 for normal text and 4.5:1 for large text
You can be get the hexadecimal numbers from Photoshop (designers), or by right clicking the text and having the Firefox plug-in FireBug (developers). In this case the CSS is:
.NYT5Style .byline { color: #808080; font-size: 10px; line-height: 12px; margin: 4px 0 2px; }
The screenshot shows the Colour Contrast Checker after I added the CSS from one of the home page bylines. As you can see, the foreground color #808080 is a light gray, which has inadequate color contrast on a white background with a ratio of 3.95.

Another reason it might be difficult for others to read the byline is because the font size is only ten pixels (10px). I recommend that the font size be no smaller than 12 to 14 pixels (12px to 14px) depending on font choice. The font Arial at 12 pixels (12px) is smaller than Helvetica at 12 pixels (12px).
Some of the more popular color contrast checkers/resources are:
- Jonathan Snook’s – “Colour Contrast Checker” – web based
- Color Oracle – color mask that overlays main screen
- Accessibility Color Wheel
- List of 10 Color Checkers by Roger Johansson – contains other examples
Providing Visual Cues for Keyboard-only Users
It is difficult to see where you are (that is, which links are active) when tabbing through the home page. One way the New York Times can fix this is by adding “:active” (IE browsers) and “:focus” (for all other browsers) in the CSS to the elements that include “:hover.” Then, when you tab, the links are indicated (in this example, with an underline).
Here are the current and updated examples of the CSS:
Current CSS
a:hover { text-decoration: underline }
Updated CSS
a:hover, a:focus, a:active { text-decoration: underline }
Making the Video Player Keyboard Accessible
Keyboard-only users cannot play, pause, enlarge the video to fill the entire screen, or change the volume.
A friend who works in the accessibility field asked if I knew of any way to make a YouTube player keyboard accessible for a .gov website he and his team were working on. I told him how Derek Featherstone and his team had used YouTube’s API to create their own links to play, pause, etc. the video by using JavaScript and CSS to place the links over the inaccessible ones. Due to time constraints, my friend and his teammates added an additional set of controls below the video, which did the trick of making the video player accessible.
Captioning Videos
I looked at several videos on the home page, and none of them had captioning. Lack of captions can make following, along with the video difficult for those that are deaf or hard-of-hearing .
Solve this problem by getting the videos captioned. Many services are available that will caption your videos for a price. The quality of the captioning somewhat depends on how much money you have to spend.
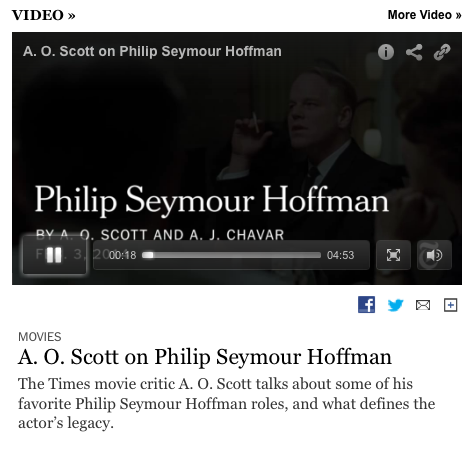
No captions available
Another solution is to take a transcript, if available and use captioning software that will split the text/captions at the correct places.
Conclusion
So this concludes Part 2 of my series on “Simple Accessibility Updates to Improve the New York Times New Redesign”. The next blog post will be about the accessibility issues found on the article pages, which I’m guessing will have similar issues as the home page does, and finally how to use all the tools I used.
I hope this post helps you find easy ways to check your websites quickly for accessibility issues, along with pointing out a few free tools you can use.
If you have other tools or software that you use to check website accessibility, please add them in the comments, because not all tools will find all the issues.
References
Screen Readers
Skip Navigation Articles
- Web AIM’s – “Skip Navigation” Links – @WebAIM
- Multiple Skip Navigation articles by Roger Johansson (456 Berea Street) – @rogerjohansson
You can find more great accessibility articles on both of these websites.
Color Contrast Tools
- Jonathan Snook’s – “Colour Contrast Checker” – web based
- Color Oracle – color mask that overlays main screen
- Accessibility Color Wheel
- List of 10 Color Checkers by Roger Johansson – contains other examples
Edited by: Char James-Tanny of JTF Associates, Inc. – @CharJTF